There is a profound sense of liberation that comes with standing atop a ridge in the Brecon Beacons or wandering through the ancient woodlands of the New Forest, completely alone. For many women, solo hiking is an act of reclaiming independence and finding a quiet strength in the great British outdoors.
However, that sense of peace can vanish the moment the mist rolls in—which, let’s be honest, happens quite often on our hills. Suddenly, the path disappears, the landmarks fade, and the “clues” you were following vanish. For a solo hiker, the ability to navigate isn’t just a technical skill; it is your freedom pass.
In this guide, we’ll break down the fundamental navigation skills every new solo female hiker needs to master. Whether you are using a digital app or a traditional paper map, these skills will ensure that you are never truly lost—only “temporarily misplaced.”
The “Stay Found” Philosophy
In the UK, we are blessed with an incredible network of public footpaths. But unlike some American trails that are wide and heavily marked, British trails can be subtle. They can turn into sheep tracks, be obscured by bracken, or lead you straight into a bog.
The secret to navigation isn’t knowing where you are when you’re lost; it’s staying found throughout the journey. This means constantly “ticking off” features as you pass them.
The Three Pillars of UK Navigation:
Map Reading: Understanding the language of the landscape.
Orientation: Keeping your map aligned with the real world.
Distance Estimation: Knowing how far you’ve walked and how long it should take.
Digital vs. Paper: The Great Debate
In 2026, we have incredible technology at our fingertips. But should you rely on it?
Digital (OS Maps, AllTrails, Komoot):
Pros: Real-time GPS location (the “Blue Dot”), easy to track elevation, offline maps.
Cons: Batteries die in the cold, screens break, and signal can be non-existent in the deep valleys of the Lake District.
Paper (Ordnance Survey Maps):
Pros: Never runs out of battery, gives a “big picture” view of the terrain, and is essential for emergency orientation.
Cons: Can be tricky to handle in high winds or pouring rain (unless you use the waterproof Active maps).
The Solo Hiker’s Rule: Use digital for convenience, but always carry a paper map and a compass as your primary backup.
Essential Skill: Understanding Grid References
British navigation revolves around the Ordnance Survey (OS) Grid System. Being able to give a six-figure grid reference is a life-saving skill. If you twist an ankle and need to call Mountain Rescue, they will ask for your “Grid Ref.”
Eastings First, Northings Second: Remember the old school mnemonic: “Along the corridor and up the stairs.”
Four-Figure Ref: Identifies a 1km square (e.g., GR 12 34).
Six-Figure Ref: Identifies a 100-metre square (e.g., GR 123 345). This is what you need for an emergency.
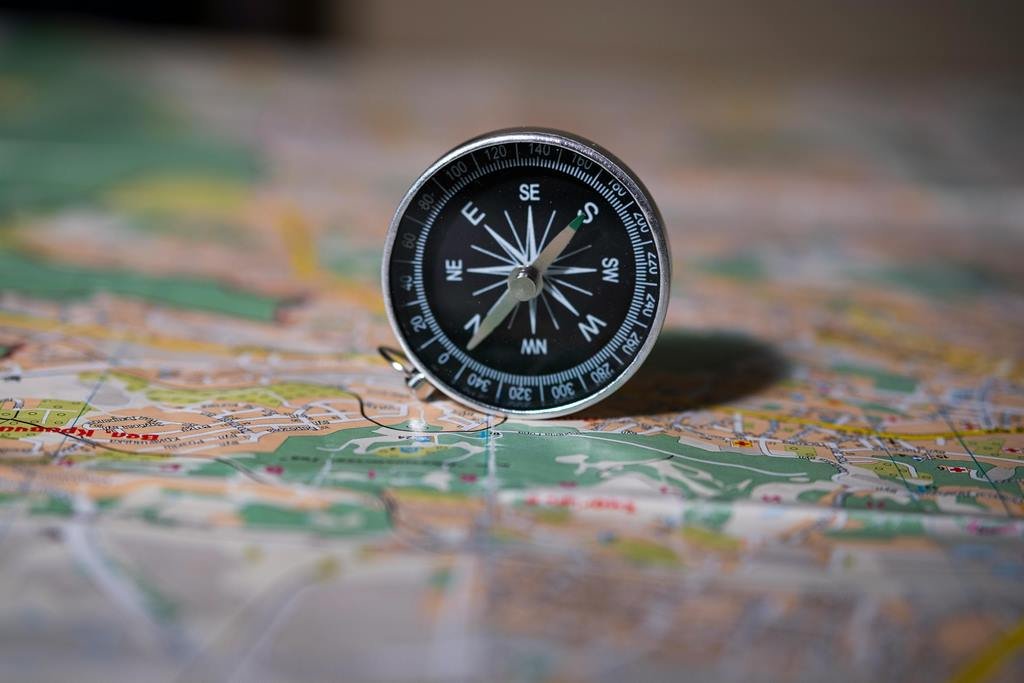
Master the Compass: More Than Just a Needle
For a beginner, a compass can seem intimidating. You don’t need to be a sea captain to use one. For UK hiking, you primarily need it for two things:
Setting the Map: Turning the map so that North on the paper matches North in the real world.
Taking a Bearing: If the fog comes down, you use the compass to find the exact direction of the path you need to follow.
Comparison: Navigation Tools for Solo Hikers
| Tool | Purpose | Reliability | Beginner Friendliness | Price |
| OS Maps App | Primary navigation & GPS | High (with power bank) | Excellent | £28/year |
| Silva Explorer Compass | Direction & Bearings | Absolute (No batteries) | Moderate (Requires practice) | £25 |
| OS Paper Map (Active) | Backup & Planning | Absolute | High | £15 |
| Garmin inReach Mini | Satellite SOS | Highest (No signal needed) | Moderate | £300+ |
| AllTrails App | Route Inspiration | High | Very High | Free / Paid |
3 “Solo-Safe” Navigation Habits
The “Thumb” Technique: Keep your thumb on the map at your current location. Move it as you walk. This prevents you from “searching” the whole map every time you look down.
Catching Features: Identify a feature beyond your destination (like a road or a river). If you hit that feature, you know you’ve gone too far.
The 15-Minute Check: Every 15 minutes, stop and verify your location. If you haven’t seen the wall or the stream you expected, stop immediately and re-evaluate.
FAQ: Navigation for Beginners
1. Which OS map scale is best for hiking?
For detailed hiking, the 1:25,000 (Explorer) series is best. It shows every wall, stile, and sheepfold. The 1:50,000 (Landranger) is better for cycling or long-distance planning.
2. What do I do if my phone dies and I’m lost?
Don’t panic. Stop. Take out your paper map. Look for “big” features—valleys, peaks, or roads. If it’s dark, use your head torch to find a safe place to wait or follow a watercourse downhill (rivers usually lead to civilization in the UK).
3. Do I need an expensive GPS watch?
Not necessarily. A smartphone with the OS Maps app is more than enough for most UK trails. A watch is a nice luxury for tracking stats, but it doesn’t replace the need for map-reading skills.
4. How do I practice without getting lost for real?
Take your map and compass to a local park or a well-marked trail you know well. Try to identify every symbol on the map in the real world.
5. Is the “Blue Dot” on my phone always accurate?
Usually, yes. However, in deep “cloughs” or near high cliffs, the signal can bounce, showing you 50 metres away from where you actually are. Always cross-reference the digital dot with the terrain you see.